The Process - How we Make a Ring
David Ashton bespoke jewellery making
A lot goes into making one single piece of jewellery


- 1
Crafting Perfection
First, we take the time to meet with you—either in person or virtually—to understand exactly what you’re looking for. Together, we’ll explore examples of David’s work, discuss your ideas, and if needed, create a few sketches to help visualise your piece. Once the design is approved, the making begins.
- 2
The Art of Wire Drawing
- 3
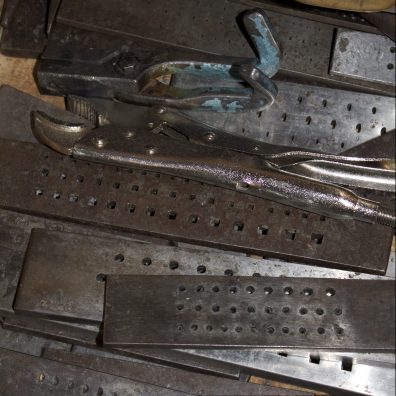
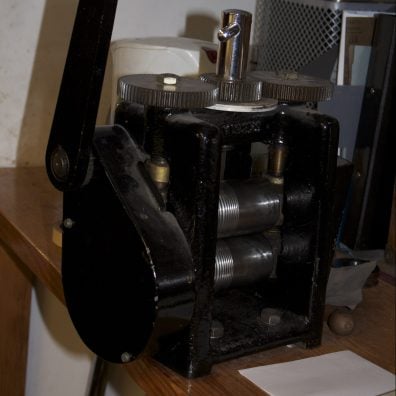
The Rolling Mills: Shaping Precision

- 4
Before and after milling & drawing.
Every bespoke ring at David Ashton is built on uncompromising foundations. What started as a substantial 6mm square platinum rod has been carefully drawn and milled down to a precise 3.3 x 1.9 mm D-shape profile wire. This formed shank has now received its official British hallmark—a guarantee of precious metal quality and authenticity—marking it ready for next stage.
- 5
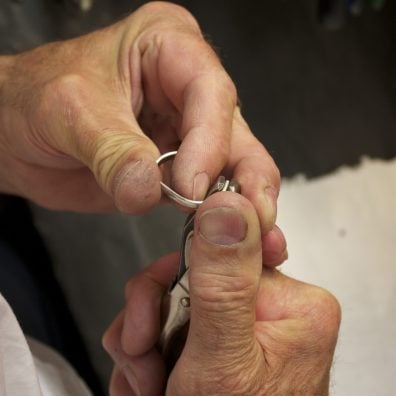
Sculpting the Perfect Band

- 6
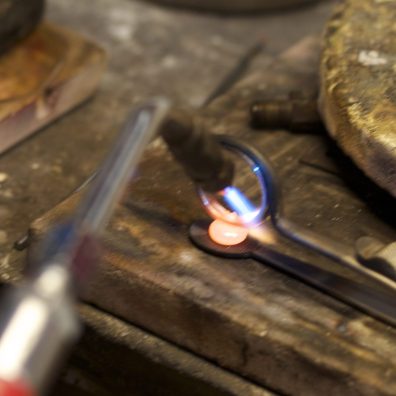
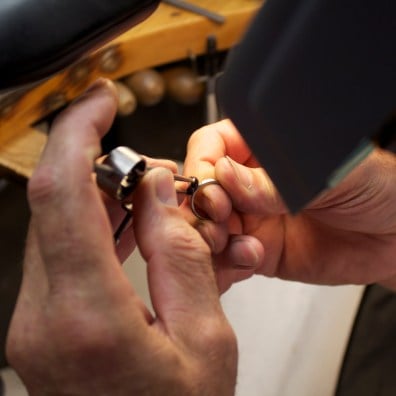
High-Temperature Platinum Welding
Closing the circle of the band is a moment of pure alchemy. Utilizing an oxyacetylene torch, David fuses the platinum ends together at an incredible 1,768°C (3,224°F). Because platinum demands such extreme temperatures, this stage requires the steady hand of a master goldsmith. The result is a seamless, incredibly strong bond—the hallmark of a truly handmade luxury ring built to last generations.
- 7
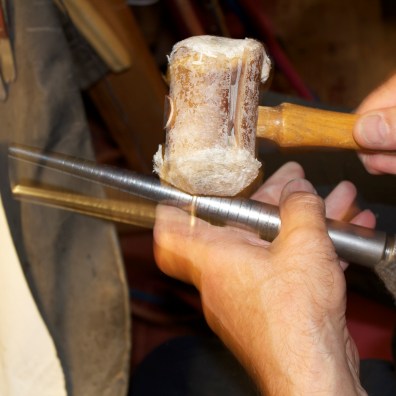
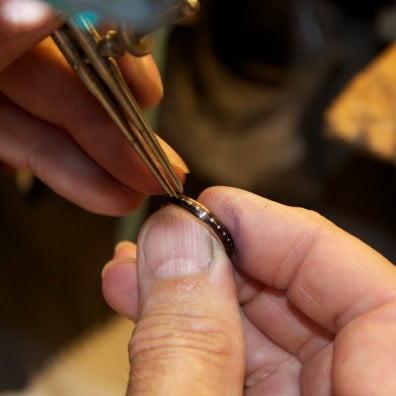
True Calibration: Perfect Sizing and Symmetry
To ensure the ring achieves a perfectly circular form and precise sizing, David utilizes a traditional steel mandrel and a specialized hide mallet. By choosing hide over metal, he can gently coax the platinum into its final, exact dimensions without ever marring or marking its pristine surface. This delicate balance of force and finesse ensures the ring’s structural integrity remains flawless
- 8
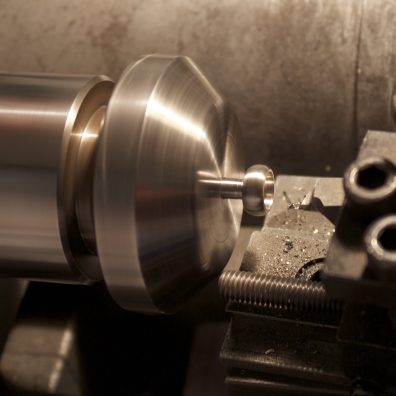
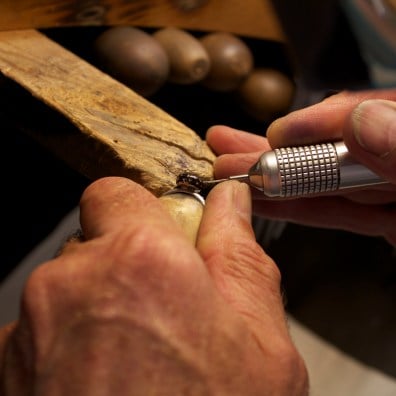
Precision Lathe Work
Precision meets artistry at the lathe. This piece showcases the initial shaping of a custom platinum bulb setting, designed to seamlessly marry rub-over and grain-set diamonds. Bypassing the shortcuts of mass production, David hand-turns each component to achieve flawless geometric accuracy. It is this dedication to manual mastery that defines David Ashton Bespoke Jewellery, guaranteeing an entirely unique creation.
- 9
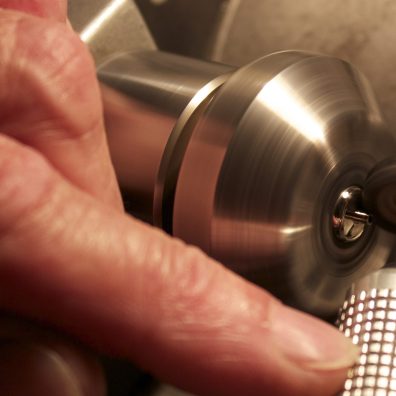
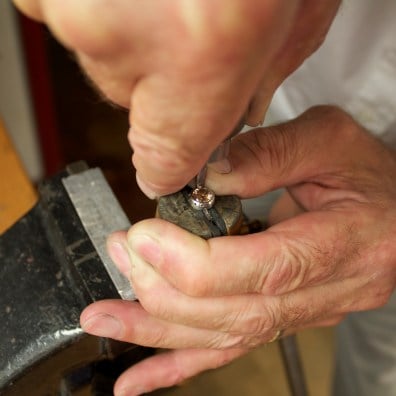
Engineering the Perfect Fit
No detail is too small when securing a precious gemstone. David hand-sculpts the platinum setting on the lathe, checking its concentricity until it is perfectly round—a step that guarantees the diamond fits snugly into its seat without a fraction of a millimeter of play. He expertly turns the piece around to access its reverse side. Here, the dual magic of finishing and engineering takes place: David applies fine abrasives to polish the platinum surface to a brilliant sheen, while simultaneously machining a solid, precise post. This post is the hidden backbone of the design, engineered to seamlessly fuse the diamond setting to the handmade shank.
- 10
Achieving the Seamless Weld
- 11
The Instrument Maker's Eye
Securing diamonds into a custom band requires flawless geometry. Using traditional marking dividers, David hand-measures the spacing for each gemstone directly onto the platinum shank. A layer of dark layout ink is first applied to the metal, providing a high-contrast canvas that exposes the incredibly fine, precise lines required for the diamond layout. This level of micro-engineering stems directly from David’s unique heritage: his early career crafting scientific and medical instruments in Cambridge. Today, those same rigorous, hyper-precise standards are poured into fine jewelry, ensuring each diamond is seated with flawless alignment.
- 12
Micro-Precision Engineering:
- 13
After marking out, the holes are drilled.
- 14
The main diamond is a rub-over set.
- 15
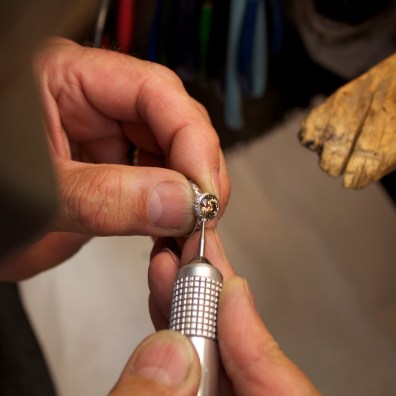
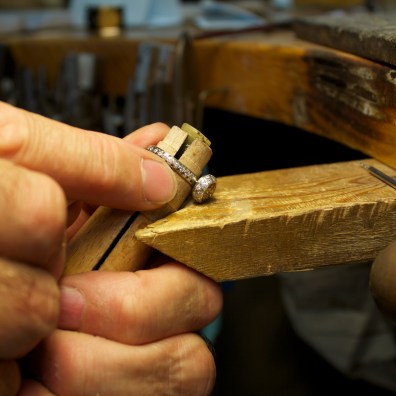
Micro-Calibration and Stone Setting
- 16
Revealing the Mirror Finish
Achieving a snag-free, high-end pavé setting demands incredible tactile discipline. David delicately shapes the platinum surrounding each stone into uniform, rounded grains, anchoring the brilliant-cut diamonds flush with the metal profile. The final journey of the ring is one of pure patience: a multi-layered polishing regimen. Because platinum is incredibly dense and notoriously difficult to finish, David employs a specialized sequence of abrasive compounds, graduating from medium cutting grades to ultra-fine finishing bars. This extensive manual labor is the only way to eliminate surface tension and deliver the signature, breathtaking mirror-shine characteristic of bespoke fine jewelry.


- 17
The Finished Masterpiece
After dozens of hours of intense focus, hand-tooling, and multi-stage polishing, the finished platinum ring is unveiled. The spectacular design centers around a rare, natural fancy-colored diamond, beautifully elevated by a contrasting frame of white accent diamonds. By pairing the density of hand-worked platinum with the precise mathematical alignment of 104 individual gemstones, the piece achieves a perfect balance of structural integrity and high-end aesthetics. It stands as the definitive expression of David Ashton Bespoke Jewellery: an entirely unique, handmade creation where raw precious materials are elevated into an extraordinary work of wearable art.
